Alexa ohne Cloud
hier erfährst du wie man Alexa ohne Nabu Casa Cloud in Homeassistant integrieren kannst
Voraussetzungen
Dein Homeassistant muss von aussen erreichbar sein - schau dir hierzu gern meinen Cloudflare Betrag an:
melde dich mit deinem Amazon Konto im Dev Portal anmelden
jetzt benötigst du eine Kreditkarte oder eine Bankverbindung (keine Angst das hier kostet nichts im Monat nur einmalig 1€) für die Anmeldung bei AWS
Verwendet überall das Konto womit eure Alexas verbunden sind
Installation
Skill erstellen
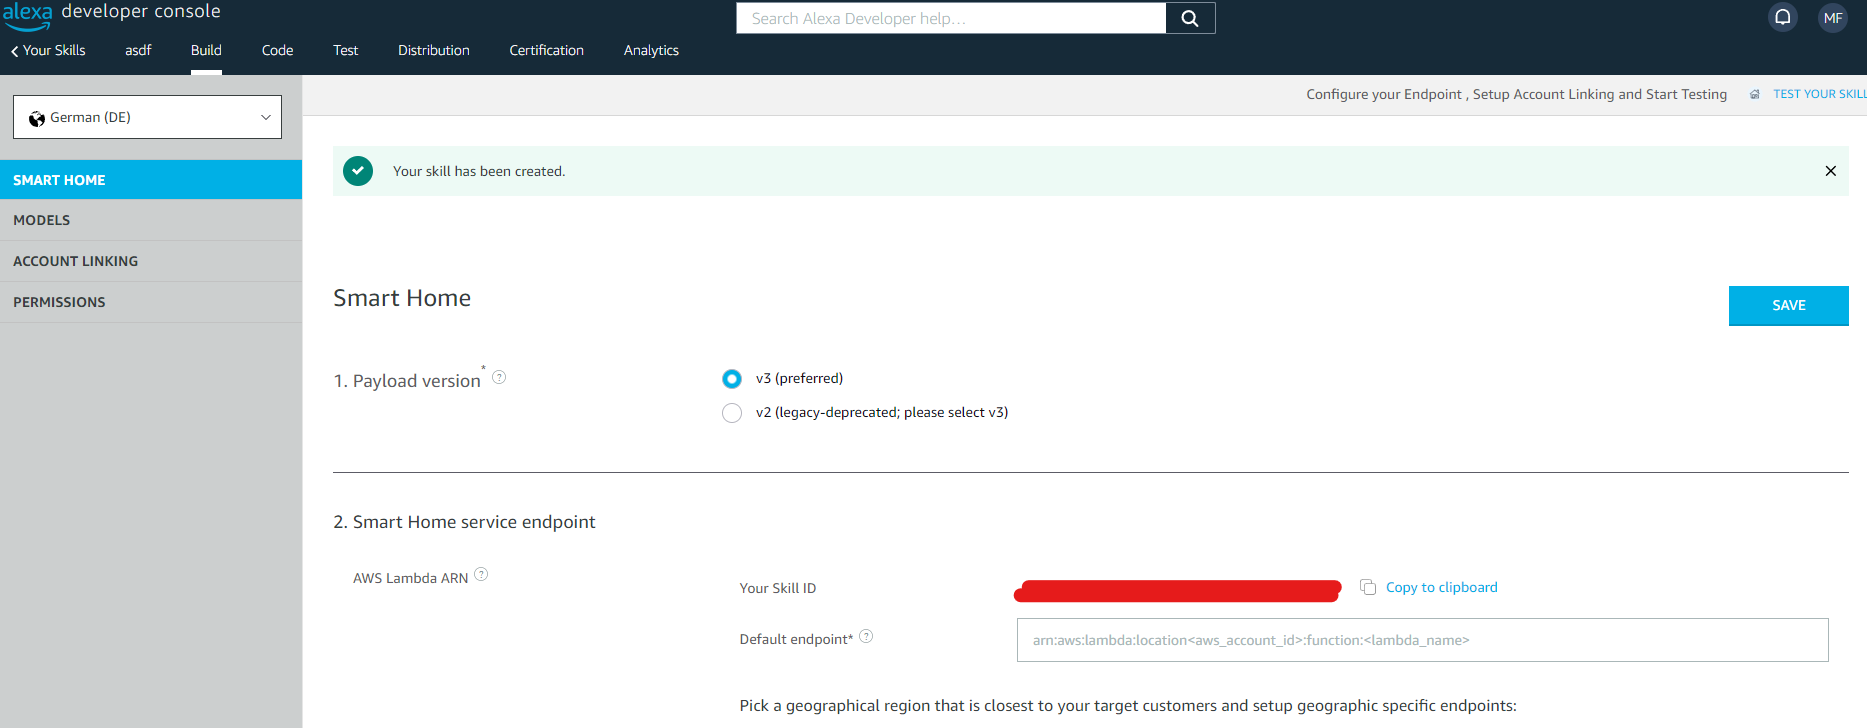
Starte auf der Developer Seite und erstelle dort einen neuen Skill. Als Skillname kannst du verwenden was du möchtest. Bei Sprache wählst du bitte German.
Im nächsten Step wählst du bitte Smart Home
und dann klickst du dich durch bis der Skill erstellt ist.
Lambda Rolle erstellen
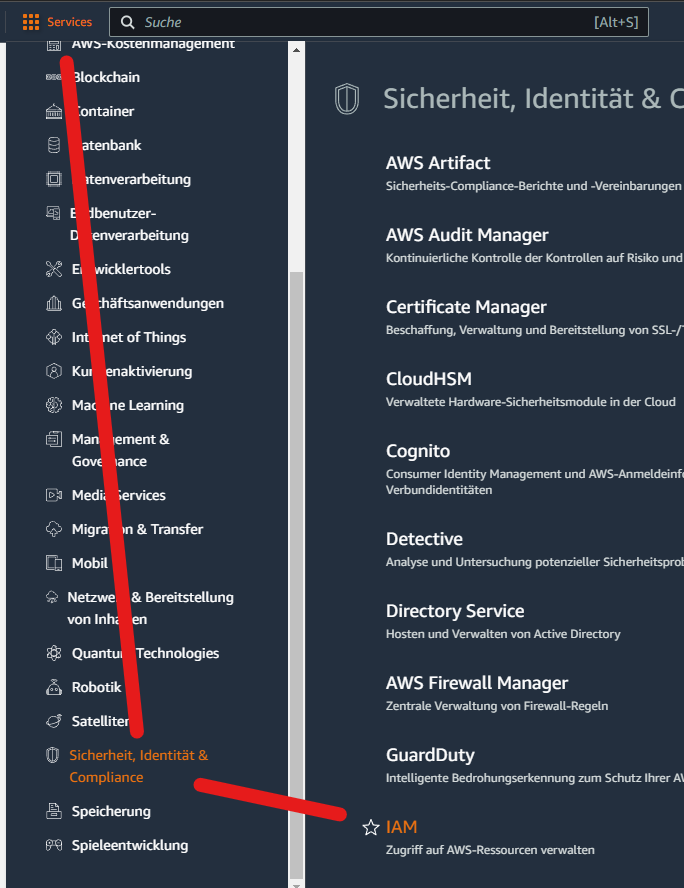
Jetzt wechseln wir auf die AWS Seite und gehen dort auf Servies - Sicherheit - IAM
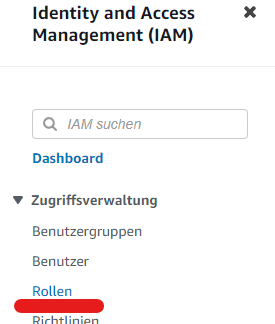
Dort im Abschnitt Rollen
erstellen wir eine neue Rolle.
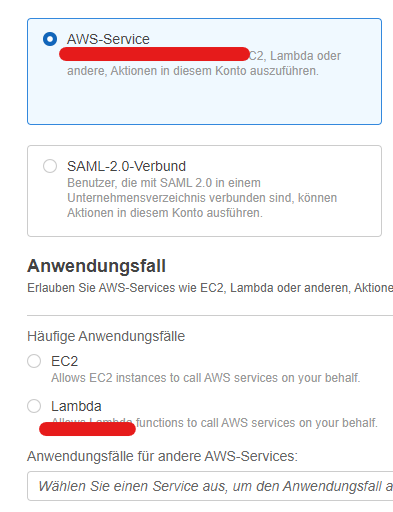
Wählt hier AWS Service und Lambda.
Jetzt sucht ihr euch:
AWSLambdaBasicExecutionRoleaus der Liste und setzt einen Hacken davor - scrollt nach unten und drückt auf weiter. Jetzt noch einen beliebigen Namen vergeben und Rolle erstellen.
Lambda konfigurieren und testen
Als erstes checkt bitte das eure AWS auf Irland gestellt ist
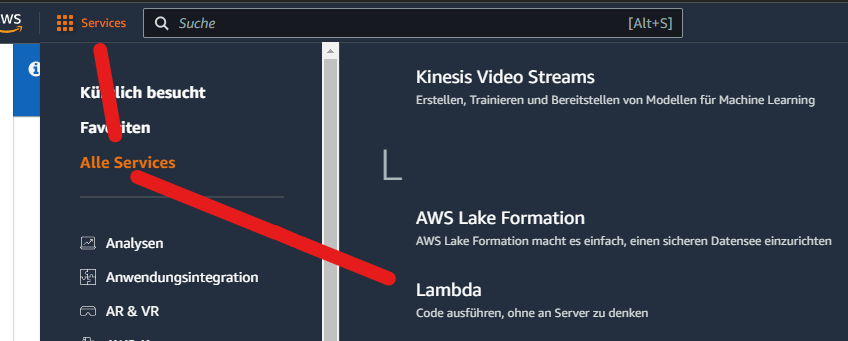
Jetzt müssen wir noch den Lambda Funktion erstellen. Dazu öffnet ihr bitte die Lambda über Services / Alle Services
Jetzt erstellt ihr eine Funktion mit folgenden Werten:
Name: wie ihr wollt
Laufzeit: Python 3.9

Standard Ausführungsrolle: hier wählt ihr eure zuvor erstellte Rolle aus
Jetzt noch
und dort
auswählen und konfigurieren:
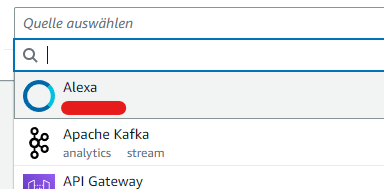
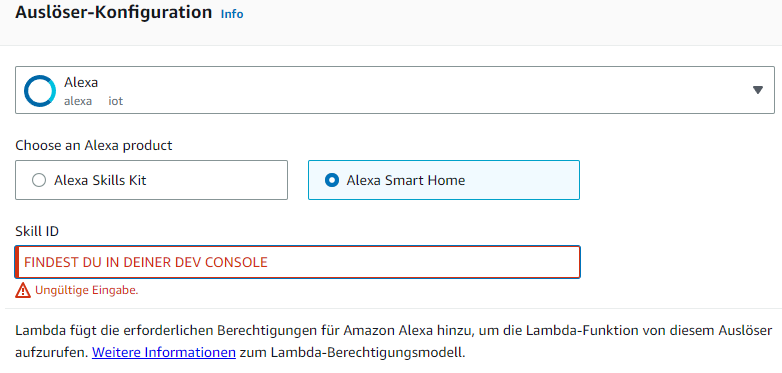
Nachdem der Auslöser hinterlegt habt fügt ihr folgenden Code in die Lambda Function ein:
Lambda Function Code
"""
Copyright 2019 Jason Hu <awaregit at gmail.com>

Licensed under the Apache License, Version 2.0 (the "License");
you may not use this file except in compliance with the License.
You may obtain a copy of the License at

    http://www.apache.org/licenses/LICENSE-2.0

Unless required by applicable law or agreed to in writing, software
distributed under the License is distributed on an "AS IS" BASIS,
WITHOUT WARRANTIES OR CONDITIONS OF ANY KIND, either express or implied.
See the License for the specific language governing permissions and
limitations under the License.
"""
import os
import json
import logging
import urllib3

_debug = bool(os.environ.get('DEBUG'))

_logger = logging.getLogger('HomeAssistant-SmartHome')
_logger.setLevel(logging.DEBUG if _debug else logging.INFO)


def lambda_handler(event, context):
    """Handle incoming Alexa directive."""

    _logger.debug('Event: %s', event)

    base_url = os.environ.get('BASE_URL')
    assert base_url is not None, 'Please set BASE_URL environment variable'
    base_url = base_url.strip("/")

    directive = event.get('directive')
    assert directive is not None, 'Malformatted request - missing directive'
    assert directive.get('header', {}).get('payloadVersion') == '3', \
        'Only support payloadVersion == 3'

    scope = directive.get('endpoint', {}).get('scope')
    if scope is None:
        # token is in grantee for Linking directive
        scope = directive.get('payload', {}).get('grantee')
    if scope is None:
        # token is in payload for Discovery directive
        scope = directive.get('payload', {}).get('scope')
    assert scope is not None, 'Malformatted request - missing endpoint.scope'
    assert scope.get('type') == 'BearerToken', 'Only support BearerToken'

    token = scope.get('token')
    if token is None and _debug:
        token = os.environ.get('LONG_LIVED_ACCESS_TOKEN')  # only for debug purpose

    verify_ssl = not bool(os.environ.get('NOT_VERIFY_SSL'))

    http = urllib3.PoolManager(
        cert_reqs='CERT_REQUIRED' if verify_ssl else 'CERT_NONE',
        timeout=urllib3.Timeout(connect=2.0, read=10.0)
    )

    response = http.request(
        'POST',
        '{}/api/alexa/smart_home'.format(base_url),
        headers={
            'Authorization': 'Bearer {}'.format(token),
            'Content-Type': 'application/json',
        },
        body=json.dumps(event).encode('utf-8'),
    )
    if response.status >= 400:
        return {
            'event': {
                'payload': {
                    'type': 'INVALID_AUTHORIZATION_CREDENTIAL'
                            if response.status in (401, 403) else 'INTERNAL_ERROR',
                    'message': response.data.decode("utf-8"),
                }
            }
        }
    return json.loads(response.data.decode('utf-8'))
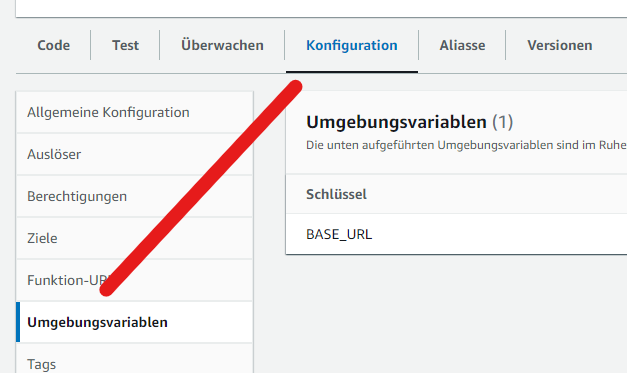
Danach auf Deploy und jetzt noch die Umgebungsvariablen bearbeiten:
klickt auf Bearbeiten und fügt folgenden Schlüssel:
BASE_URLWICHTIG: falls ihr DuckDNS etc. verwendet! Die URL darf keinen Port enthalten!
hinzu und als Wert dahinter eure URL womit ihr von aussen auf euren Homeassistant connecten könnt.
Jetzt passt ihr eure Configuration.yaml noch an um die Lambda zu testen:
alexa:
  smart_home:
wenn du die alexa.yaml verwendest darfst du nicht vergessen diese mit alexa: !include alexa.yaml einzubinden
für den Lambda Test nutzt ihr dann folgenden Code:
Test Code
{
  "directive": {
    "header": {
      "namespace": "Alexa.Discovery",
      "name": "Discover",
      "payloadVersion": "3",
      "messageId": "1bd5d003-31b9-476f-ad03-71d471922820"
    },
    "payload": {
      "scope": {
        "type": "BearerToken"
      }
    }
  }
}
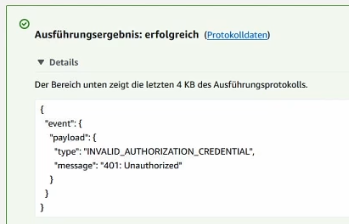
Als Ergebnis sollte folgender Fehler erscheinen:
Sollte hier ein 404 Fehler kommen - bitte die BASE_URL prüfen ( https://deineurl.de ) hier muss https davor stehen und kein / dahinter.
Skill fertigstellen in Amazon Dev
Fügt jetzt euren Endpoint von AWS in Amazon Dev ein und prüft nochmals die Location im URL und speichert.
Danach klickt ihr auf:
und füllt dies wiefolgt aus:
-
Authorization URI:https://[YOUR HOME ASSISTANT URL]/auth/authorize -
Access Token URI:https://[YOUR HOME ASSISTANT URL]/auth/token Client ID:https://layla.amazon.com/- Client Secret könnt ihr eintragen was ihr wollt.
- Your Authentication Scheme:
Credentials in request body - Scope add ->
smart_home
ACHTUNG! Aktiviert den Skill erst wenn ihr den nachfolgenden Schritt erledigt habt und eure Geräte in die Alexa Config eingetragen habt! Sonst habt ihr alle Geräte in Alexa
Sollte das Accountlinking fehlschlagen probier mal deine Domain von Homeassistant zu hinterlegen:
Alexa App und yaml
Jetzt müsst ihr nur noch euren Alexa Skill aktivieren und die yaml anpassen - hier mein Beispielcode
smart_home:
  locale: de-DE
  endpoint: https://api.eu.amazonalexa.com/v3/events
  filter:
    include_entities:
      - light.licht_speise
      - light.licht_waschkuche
      - light.ambiente_pc
Homeassistant neustarten nicht vergessen ;)


